Top of the pageActionset
High Blood Pressure: Checking Your Blood Pressure at Home
Introduction
- When blood pressure is high, it starts to damage the blood vessels, heart, and kidneys. This can lead to heart attack, stroke, kidney disease, and other problems. But if you don’t measure your blood pressure, you won’t know when it’s high, because there are usually no symptoms.
- A home blood pressure monitor makes it easy to keep track of your blood pressure.
- You can check your blood pressure at different times and in different places (such as at home and at work) during the day.
- Checking your blood pressure at home helps you work with your doctor to diagnose and manage your blood pressure. Checking it at home does not replace having it checked by your doctor.
How to take your blood pressure at home
Blood pressure monitors
There are two types of blood pressure monitors:
- Automatic monitors. These are easier to use. They do the listening for you.
- Manual monitors. This is the kind of device you usually see at the doctor’s office. It involves using a stethoscope to listen to the heartbeat.
Buying and maintaining a monitor
When you first get a blood pressure device, check its accuracy. Do this by comparing its readings with those you get at the doctor’s office. Ask your doctor or nurse to watch you use your device to make sure that you are doing it right and that it works right. It’s a good idea to have your device checked every year at the doctor’s office.
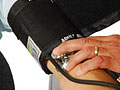
The size of the blood pressure cuff and where you place it can greatly affect how accurate your device is. If the cuff is too small or too large, the results won’t be right. You may have to measure your arm and choose a monitor that comes in the right size.
A monitor that measures blood pressure in your arm is recommended for most people. Blood pressure monitors used on the wrist aren’t as reliable as those that use arm cuffs. Wrist monitors should be used only by people who can’t use arm cuffs for physical reasons. And devices that use finger monitors aren’t recommended at all.footnote 1
Check your blood pressure cuff often. Make sure all of the parts of your monitor are in good condition. Even a small hole or crack in the tubing can lead to inaccurate results.
Getting ready
Before you take your blood pressure:
- Don’t eat, smoke, or exercise for at least 30 minutes. And don’t use any medicines that can raise blood pressure, such as certain nasal sprays.
- Rest at least 5 minutes before you take a reading. Sit in a comfortable, relaxed position with both feet on the floor. Don’t move or talk while you are measuring your blood pressure.
- Try not to take your blood pressure if you are nervous or upset.
- If you can, use the same arm for every reading. Readings may be 10 to 20 mm Hg different between your right arm and your left arm.
Remember that blood pressure readings vary throughout the day. They usually are highest in the morning after you wake up and move around. They decrease throughout the day and are lowest in the evening.
When you first start taking your blood pressure at home, always take your blood pressure 3 times. Wait 1 to 2 minutes between recordings to let the blood flow back into your arm. After you get better at doing it, you probably will need to do it only once or twice each time.
Using an automatic blood pressure monitor
- Sit with your arm slightly bent and resting comfortably on a table so that your upper arm is on the same level as your heart.
- Wrap the blood pressure cuff around your bare upper arm. The lower edge of the cuff should be about 1 inch (2.5 cm) above the bend of your elbow.
- Press the on/off button.
- Wait until the ready-to-measure “heart” symbol appears next to zero in the display window.
- Press the start button. The cuff will inflate.
- After a few seconds, the cuff will begin to deflate. The numbers on the screen will begin to drop.
- When the measurement is complete, the heart symbol stops flashing. The numbers tell you your blood pressure and pulse.
Using a manual blood pressure monitor
If you’re not familiar with using a stethoscope, you may want to get help from someone who is. The accuracy of a blood pressure recording depends on putting the stethoscope in just the right place.
- Sit with your arm slightly bent and resting comfortably on a table so that your upper arm is on the same level as your heart.
- Wrap the blood pressure cuff around your bare upper arm. The lower edge of the cuff should be about 1 inch (2.5 cm) above the bend of your elbow.
- Close the valve on the rubber inflating bulb. Squeeze the bulb rapidly with your opposite hand to inflate the cuff. Keep squeezing until the dial or column of mercury reads about 30 mm Hg higher than your usual systolic pressure. (If you don’t know your usual pressure, inflate the cuff to 210 mm Hg.) The pressure in the cuff will temporarily stop all blood flow in your arm.
- Put the stethoscope over the large artery slightly above the inside of your elbow. You can find this artery by feeling for its pulse with the fingers of your other hand. If you are using a cuff with a built-in stethoscope, be sure the part of the cuff with the stethoscope is over the artery. Don’t let the stethoscope rub on the cuff or your clothing. This may cause noises that make your pulse hard to hear.
- Open the valve on the bulb just slightly. The numbers on the pressure dial or mercury tube should fall gradually—about 2 to 3 mm Hg per second. Some devices automatically control the fall at this rate.
- Listen through the stethoscope. As you watch the pressure slowly fall, note the number on the dial or tube when you first start to hear a pulsing or tapping sound. The sound is caused by the blood starting to move through the closed artery. This is your systolic blood pressure.
- Continue letting the air out slowly. The sounds will become muffled and finally will disappear. Note the number when the sounds completely disappear. This is your diastolic blood pressure. Finally, let out all the remaining air to take the cuff off.
Keep a blood pressure diary
Keep a blood pressure diary. Your records may help explain changes in your blood pressure readings and help your doctor make sure you get the right treatment.
Everyone’s blood pressure changes from day to day and even from minute to minute sometimes. Blood pressure tends to be higher in the morning and lower at night. Stress, smoking, eating, exercise, cold, pain, noise, medicines, and even talking can affect it.
Record your blood pressure numbers with the date and time. You might use a home blood pressure log( What is a PDF document? ) or a spreadsheet on your computer. Your monitor might have a feature that will record your numbers for you. Some monitors can transfer this information to your computer.
Also record your daily activities, such as the time you take medicine or if you feel upset or feel stressed.
References
Citations
- American Heart Association. (2005). Recommendations for blood pressure measurement in humans and experimental animals. Part 1: Blood pressure measurement in humans. AHA Scientific Statement. Hypertension, 45(1): 142–161.
Other Works Consulted
- Weber MA, et al. (2013). Clinical practice guidelines for the management of hypertension in the community. Journal of Clinical Hypertension. DOI: 10.1111/jch.12237. Accessed December 19, 2013.
Credits
Current as of: April 9, 2019
Author: Healthwise Staff
Medical Review:E. Gregory Thompson, MD – Internal Medicine & Martin J. Gabica, MD – Family Medicine & Adam Husney, MD – Family Medicine
Current as of: April 9, 2019
Author: Healthwise Staff
Medical Review:E. Gregory Thompson, MD – Internal Medicine & Martin J. Gabica, MD – Family Medicine & Adam Husney, MD – Family Medicine
 Blood Pressure Cuff: A Proper Fit
 Blood Pressure Cuff: Too Small
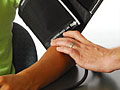 Blood Pressure Cuff: Too Large
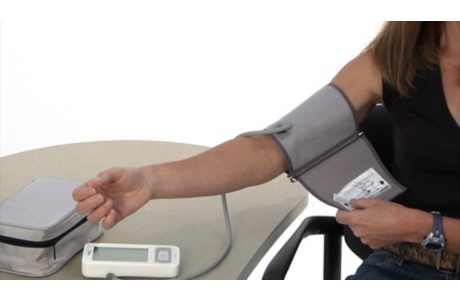 Taking Blood Pressure at Home
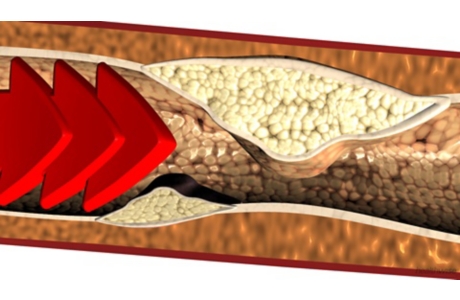 The Effects of High Blood Pressure
 Lifestyle Changes to Lower Blood Pressure
 Taking Blood Pressure Medicine: How Others Decided
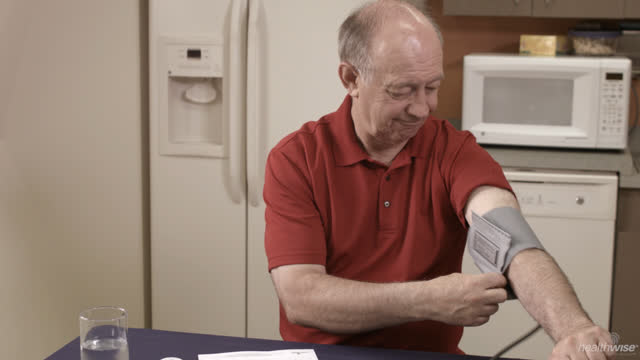 High Blood Pressure: Make the Most of Home Monitoring
This information does not replace the advice of a doctor. Healthwise, Incorporated, disclaims any warranty or liability for your use of this information. Your use of this information means that you agree to the Terms of Use. Learn how we develop our content.